Tutorial: Converting an XNB mod to Content Patcher
Have you ever come across a super cute mod but then found out it was an XNB? Well, fret no more! This tutorial will help you convert that XNB mod into a Content Patcher mod (made by Pathoschild).
Unpacking XNB files
To begin, you need to download a tool to unpack that XNB mod (I recommended using XNBCLI). Download the version that works on your device, make a folder for it and extract it there.
Now that you’re done with that step, go ahead and place your XNB in the “packed” folder. Once you do that, run the “unpack” file and let it do its thing.
When the tool is done unpacking, you can now go into the “unpacked” folder to find your files! As you can see, there is a PNG as well as a JSON file. We can discard the JSON file in this case, and take the PNG for conversion.
It’s recommended that you also unpack the game’s content files (or at least the file you’ll be editing, e.g: springobjects, hairstyles, etc.) which should be found in your Stardew Valley folder, which happens to be the same place you find your Mods folder! This will help you with the rest of the process.
Converting the XNB into a Content Patcher mod
Now that we have everything unpacked and ready, we’ll start by making a folder to put the mod’s content in. In this tutorial, I’ll be converting a sprinkler retexture mod to edit the original sprites only, without affecting any game files.
Since this is going to be a CP mod, we’ll have to add [CP] before the mod name. If you’re converting someone else’s mod, it’s best that you name the folder based on their mod’s name. Inside the folder, we’re going to create yet another folder and name it “assets”. Inside the assets folder, we’re going to drop the PNG we extracted earlier.
Creating the content.json file
The next few steps will be a little more complex and will require a little bit of an understanding on how JSON files work, which you can find here. However, all will be explained along with a template to use.
First, you’re going to create a new text document and save it as content.json. Open it up in your preferred text editing software, and we can get to work. Since this is going to be a mod that retextures the sprinklers (which are found in the springobjects file in the game files), we’re going to be targeting those to edit them.
This is the template for what should go in your content.json first, before anything else:
{

  "Format": "1.23.2",

  "Changes": [

  ]

}
Keep in mind that the format number will change, that’s the version number of the latest Content Patcher at the moment. If you come across this months or years from now, the format number will have definitely changed, so make sure to check.
Next, we’re gonna use an ‘Action’, this tells CP what to do, as well as a ‘Target’ (which lets CP know what file you’re trying to edit).
{

  "Format": "1.23.2",

  "Changes": [

    {

        “Action”: “EditImage”,

        “Target”: “Maps/springobjects”,

        “FromFile”: “assets/springobjects.png”,

  ]

}
As you can see, the action we’re using is “EditImage”, which changes an area in a spritesheet instead of the entire thing. “Target” is where you can find the file you’re editing, which in our case is the springobjects file that’s found in Maps. “FromFile” lets CP know the path of the PNG we unpacked, which is now in our assets folder. Make sure to include the ‘.png’ part in that field (same goes with other file extensions, whether it's a .tmx, .tbin, etc.).
Next, we’re gonna use “FromArea” and “ToArea”.
(Screenshot taken from Pathoschild’s Content Patcher author guide).
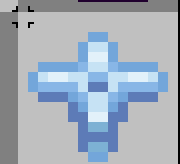
This is where you’re going to need an art program like Aseprite (paid, but you can use the trial version) or GIMP (free) to check the X Y coordinates of the item you’re replacing. We’re going to open up the image in an art program and hover over the top left corner of the sprite we’re replacing as shown in the image below.
While hovering, if you look at the bottom left corner of your screen (on Aseprite) you should be able to see the X Y coordinates of the sprite, which in this case are X = 368 and Y = 384. Now we’re going to be applying those into our content.json. We’re also going to be noting down the width and height of the sprite (which in most cases in Stardew will be 16 x 16, unless it's a portrait or a character sprite).
{

  "Format": "1.23.2",

  "Changes": [

    {

        “Action”: “EditImage”,

        “Target”: “Maps/springobjects”,

        “FromFile”: “assets/springobjects.png”,

        “FromArea”: { “X”: 368, “Y”: 384, “Width”: 16, “Height”: 16 },

        “ToArea”: { “X”: 368, “Y”: 384, “Width”: 16, “Height”: 16 }


    },

  ]

}
And there you go! You’ve edited one of the sprites using CP! If you’re trying to edit more thing, you’re just going to be repeating the same process while only changing the coordinates of the item.
{

  "Format": "1.23.2",

  "Changes": [

    {

        “Action”: “EditImage”,

        “Target”: “Maps/springobjects”,

        “FromFile”: “assets/springobjects.png”,

        “FromArea”: { “X”: 368, “Y”: 384, “Width”: 16, “Height”: 16 },

        “ToArea”: { “X”: 368, “Y”: 384, “Width”: 16, “Height”: 16 }


    },

   {

        “Action”: “EditImage”,

        “Target”: “Maps/springobjects”,

        “FromFile”: “assets/springobjects.png”,

        “FromArea”: { “X”: 336, “Y”: 400, “Width”: 16, “Height”: 16 },

        “ToArea”: { “X”: 336, “Y”: 400, “Width”: 16, “Height”: 16 }


    },

  ]

}
You’ll end up with something like this! This may not be the last step, but do not worry as the next step is much simpler.
Creating a manifest.json file
We’re gonna create another new document and save it as “manifest.json”. The content of this file will be as follows:
{

 "Name": "Cuter Sprinklers",

 "Author": "skellady",

 "Version": "1.0.0",

 "Description": "A recolor for sprinklers to make them look cuter.",

 "UniqueID": "skellady.cutersprinklers",

 "UpdateKeys": ["Nexus:???"],

 "ContentPackFor": {

   "UniqueID": "Pathoschild.ContentPatcher"

 }

}
We begin with the name of the mod, in this case, it’s Cuter Sprinklers. Next, the name of the author. Since you’ll most likely be converting someone else’s mod, it's best that you put their name in this field. Version would be 1.0.0 since it's a “new” mod, since XNB mods don’t have versions. Then you can give your mod a short, simple description. A uniqueID would include the author’s name as well as the name of the project. Since you are not uploading this mod to Nexus, we can leave the update keys field and place ‘???’ in there instead. Finally, the ContentPackFor and the UniqueID are fields that specify which mod can read this (i.e Content Patcher in this case).
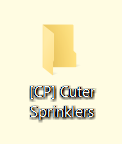
Now that we’re done, your folder should look like this:
The reason my icons for the content and manifest files look different is because I’m using Sublime Text, you can use any text editor. Make sure to always open your document before adding anything, click “Save As”, write content.json or manifest.json and save it as ALL FILES, not text document.
Enjoy your newly converted mod!
Addendum: Using the Build-A-Bear Content Patcher tool
There is also a web-tool developed to help make re-spriting/re-coloring vanilla Stardew Valley assets easy and accessible located here! Simply fill in the input boxes for the manifest and watch the JSON auto-generate in the text box preview on the right!
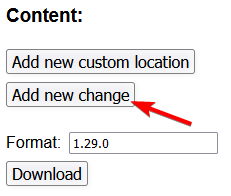
To create a new EditImage change, click the "Add new change" button under the Content section.
Drag your PNG file assets to the box marked "Drag asset(s) here" to upload them to the tool to be selected.
Then, select your target spritesheet with the (Target) dropdown. Select Animals if you are trying to replace an animal, Buildings if you are trying to replace a farm building, Craftables if you are trying to replace a Big Craftable item, Items if you are trying to replace an item located on springobjects, Furniture for any furniture item, Monsters for monster sprites, Portraits for replacing character portraits, Tools for any tools that are not the Scythe or Golden Scythe, and Weapons for any weapons and the Scythes.
If you would like to include configuration options that can also be toggled with the Generic Mod Config Menu, click "Add config option" and fill in the keyword that you would like to be used for that particular change. Multiple keywords are able to be used, including the Season token for seasonal options.
If you would like to get rid of a change or option, click the red ❌.
When you are finished, click Download to download a zipped version of your mod!
This tool was created and is maintained by holythesea, who can be contacted via the Stardew Valley Discord server.


