Tutorial: Making a New Area
PLEASE NOTE: TMXL is obsolete in 1.6 and new locations should be added via the Content Patcher method.
[Tutorial taken from LemurKat's blog]: https://lemurkat.wordpress.com/2021/01/09/mod-making-adding-new-areas/
I’ve been asked to assist with this a few times recently, so thought it well worth writing a blog post about. Today I shall be sharing how to add new maps into the game.
Firstly: for what purpose are you creating a new map? If it is for custom NPC housing, consider this question: Does my character need this much space? If you are creating a family, or perhaps an eccentric goat-herder, then perhaps, yes, your character does need a fair amount of space. If it is just a single person who will spend most of them time wandering around the other maps, then I would suggest that you look into the Boarding House mod instead. Why? Because patching the map can cause significant lag for the user (when I was running 94 custom NPCs with multiple patches and a recolor, my game would “hang” for a good 5-10 seconds when I entered the town map for the first time – and that was with a dedicated gaming laptop. Back with my desktop it tried to crash regularly). Also, players need more than one reason to wander off the familiar and into new terrain on a regular basis. It’s not enough that your NPC might be hanging out there!
Reasons to Visit:
- Multiple new NPCs, possibly even a village!
- A shop
- Interesting forage
- Good fishing
- Puzzles or a mystery to solve
Right, so you’ve decided you really need to make this map exist… now it’s a two step process and will require two framework mods: TMXL Toolkit and Content Patcher. Also, you will need the program Tiled.
It is now possible to add new locations via Content Patcher, and may mapmakers have made the shift. For details on how to code them, read the Content Patcher files.
Creating the Map
Make your map. Use an existing one as your base. This will often bring with it animated tiles, which is much easier than doing it yourself – believe me!
Size does matter! The largest you can safely get away with is 156x156 tiles. Anything larger than this, and things get weird. Width is generally safer than length for size. The largest vanilla map is Town, at 120 x 120 tiles.
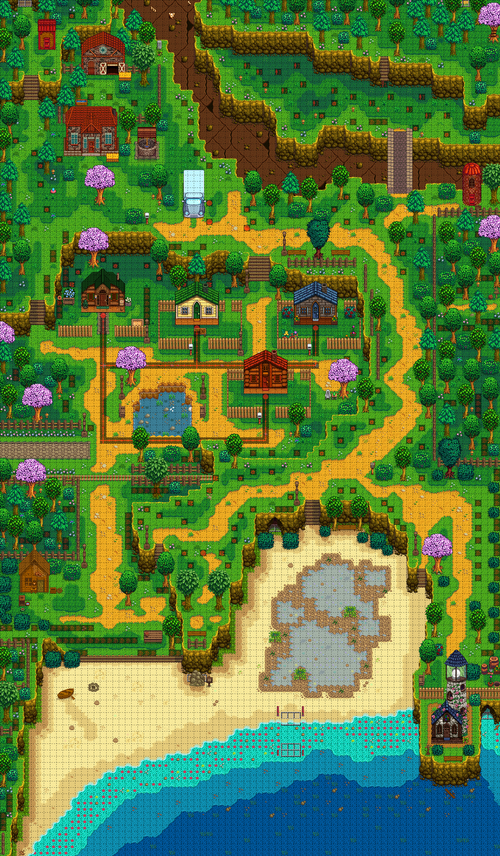
East Scarp is 80 x 137.

You can use TMXL toolkit to load custom maps. It, paired with PYTK, connects them into the game and allows NPCs to pave around and into and out of them.
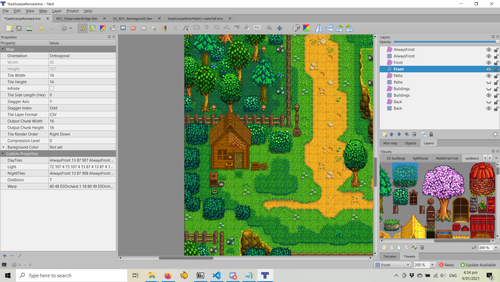
DayTiles: These are the coordinates for the lamps during the day, to make sure it shows their “off” sprite.
Format: <layer> <x coordinate> <Y coordinate> <tile index number>
Light: This sets a circlet of light around the tile coordinates, actually making the lights appear to glow at night (the light itself is always one, you just cannot see it during daylight levels)
Format: <X coordinate (of the center)> <Y coordinate (of the center)> <Light type>
NightTiles: Changes the lamp sprite to the “on” sprite after dark.
Outdoors: T = the area is outdoors and thus subject to environmental effects such as rain.
Warp: The exit warp, in the format <coordinates of exit on this map> <new Map to teleport character to> <coordinates for them to land on>
Note: If you have an additional space in the Day/NightTiles or forget to include a warp, you will get an error message when you load the map in. I believe it is “Input String was not in the correct format”.
Other Map Properties exist on current maps, including ones pertaining to fish and archaeology spots, but many of these are not implemented in game.
Note that if the area is outdoors, it will automatically change any season-prefixed tilesheets for the season. Therefore, if you are designing custom tilesheets and have one labelled "spring_MyCoolTilesheet" you must also have summer, winter and fall.
For laying out paths, load the winter tilesheet into the game. It's the easiest one to see when pathways mismatch and doing this now will prevent people pointing out issues later. You can edit/save the file using any seasonal tilesheet you like. The game will make sure it loads the seasonally relevant one.
To load the map into the game, the TMXL code is simple:
"addMaps": [
          {  "name": "EastScarpe",
             "file": "assets/EastScarpeRevised.tmx"
                  }
           ],
And that is all it takes to get your map loading into the game: but there’s only one problem!
How will your characters get there?
Accessing the Map
Every map you make will need to be connected to another map - generally a vanilla one.
The first stage for this is finding somewhere to connect it to. Real estate is becoming harder and harder to come by, and there are numerous paths forking off all over the place, so it pays to be somewhat active on the Discord forums and perhaps make sure someone else hasn't already used that area.
It is also possible to create your maps unconnected to the main maps, and access them via Bus Locations or Train Station. Note, however, that all maps require a warp to work: otherwise you will get an error. You can always connect a number of your own maps together, however, or link them to other parts of themselves.
Choosing your location: Do you want your NPCs that live there to leave? If so, do not connect your map to Secret Woods, Farm, or Backwoods. These maps are NPC blacklisted: meaning that NPCs can spawn on them and move out of them, but not move into them. If you want the chars to access the town, keep in mind it takes about an hour for an NPC to cross a map.
Be very careful giving your map multiple exits. If you inadvertently create a circular route, the NPCs will behalf unpredictably. I originally connected East Scarp to Town and Mountain: leading to Eloise walking home through the mountains alone. If you want multiple exits to exist, you need to use PYTK's "LoadMap" feature, which creates a warp the player can use, but NPCs will not.
East Scarp is connected to town just above the Blacksmith. In vanilla, there's no easy way to get there, since it's blocked by fences, so we need to create a map patch to change that part of the map.
1: Unpack the original map that the entrance is on. Open this in Tiled.
2: Find your warp points, these should be off the side of the map. Use the eraser to remove all the Building tiles from that area. Note: a lot of the maps contain invisible tiles on the Building layer. This is to prevent forage spawning. These will also need to be removed. If you set the paint bucket to "fill" you can mock flood-filling the building layer to locate any invisible building tiles. Just remember not to save it!
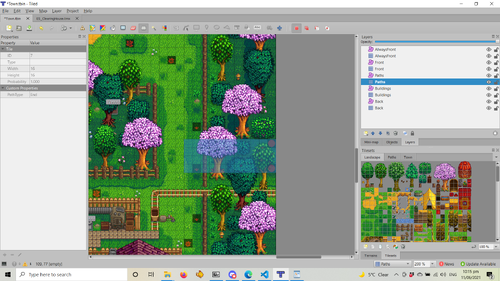
3. Make your path. You may need to remove trees, fences, or bushes from the pathing layer as well. Mark the outside of tiles of your edits with a red dot on the pathing layer, to form a rectangle. Jot down the coordinates of the top left hand corner, and the width and height in tiles.
4. Crop your patch so that it is size you need it to be. Remove ALL the map properties by clicking on them one by one and using the (-) key. If you do not do this, then your edit will over-ride any map modifications made before it loads in the game. This can result in breaking the warps of other mods, and is generally bad form.
5. Save the file.
6. Set the map patch to load into the game. This can be done via TMXL or Content Patcher, but I recommend Content Patcher, as it is easier (and less prone to bugs) to add conditions in this manner.
      {
            "Action": "EditMap",
            "Target": "Maps/Town", //The map you are patching it into
            "FromFile": "assets/Patches/ES_rev_core.tmx", //the file pathing to your map
            "ToArea": {
                "X": 109, // The X and Y coordinates of the top left hand corner
                "Y": 63,
                "Width": 11, //the width and height: these must be the same!
                "Height": 14
            },
            "When": {
                "HasMod |contains=FlashShifter.StardewValleyExpandedALL": false
            } //when conditions. More on this later!
        },
7. There are numerous mods that change the Town map! And your patch is not going to work in all of them. If you wish for full compatibility, you need to now repeat this process for every single map you can think of that also edits the area. Fun times! Even if you don't want to patch the more obscure ones, you should definitely patch for Stardew Valley Expanded, because you can be sure that if you do not, it will be requested.
Other Town-editing maps are: Reimagined, Reimagined 2, Karmylla's Town map. But not all of these are updated for 1.5, and thus may be less frequently used.
Adding the warp
There are two ways to do this, TMXL and Content Patcher. As per before, Content Patcher is preferred.
Content Patcher:
    {
            "Action": "EditMap",
            "Target": "Maps/Town", //the map you are adding the warp to
            "TextOperations": [
                {
                    "Operation": "Append", //append = add to existing without over-writing
                    "Target": [
                        "MapProperties",
                        "Warp"
                    ],
                    "Value": "120 72 ESClearingHouse 0 20 120 73 ESClearingHouse 0 20 120 74 ESClearingHouse 0 20",
                    "Delimiter": " "
                }
            ],
        },
TMXL Toolkit:
"onlyWarps":[
      {
        "name": "Town",
        "addWarps": [
          "120 72 ESClearingHouse 0 20 120 73 ESClearingHouse 0 20 120 74 ESClearingHouse 0 20"
                      ],
      }
      ]


